

You've found a metal nativity set that looks right for your home, but the practical questions start when you picture putting it up. Will the figures fit the porch without narrowing the entrance? Will the finish survive wet weather, and will the supplied stakes hold when the wind picks up?
Treat the display as a temporary outdoor structure, not just a decoration. Its footprint, coating, connections, electrical accessories, and storage arrangements all deserve attention. A well-chosen set should be readable from the intended viewing spot, stable in its installed position, and straightforward to pack away dry.
Table of Contents
- Metal Nativity Set Sizes at a Glance
- Indoor vs Outdoor Finishes Compared
- How Long Metal Nativity Sets Last Outdoors
- Placement and Accessibility for Homes and Yards
- Anchoring Outdoor Figures Against Wind and Weather
- Safe Display with Candles, Cords and Tipping
- Choose the Right Metal Nativity Set Before You Buy
Metal Nativity Set Sizes at a Glance
| Size band | Figure height | Best location | What it usually includes |
|---|---|---|---|
| Tabletop | Short enough to sit below surrounding artwork or shelving | Mantel, sideboard, entry table | Holy Family, sometimes with animals |
| Shelf or console | Fits the available vertical opening with handling room above | Fireplace hearth, shelf, indoor corner | Holy Family, manger, shepherds, star |
| Floor or yard | Readable from the intended approach or viewing point | Porch, lawn, entryway | Expanded scene with angels and Magi; outdoor figures need suitable anchors |
Use these as placement categories, not standardized product dimensions. Sellers may describe a set by its tallest figure, overall assembled height, or package size. Confirm which measurement the listing gives before comparing products.
The tradition accommodates both simple and elaborate scenes. The Smithsonian's history of Nativity representations describes the transition from live presentations to sculptural crèches made from materials including wood, terra cotta, wire, and precious metals. Metal is a material choice within that older tradition, not a separate type of Christmas story.
Measure the whole scene
Use painter's tape to mark the proposed footprint. Include the stable, projecting bases, separate star support, and the spacing between figures, rather than measuring only the Holy Family.
- Check depth: A narrow silhouette may still have a projecting support foot or rear brace.
- Check overhead room: Leave enough space to lift figures into position without scraping a shelf or mantel.
- Check the viewpoint: Stand where visitors will see the display. Open silhouettes are easier to distinguish at a distance than tightly grouped, intricate shapes.
Figure count determines footprint as much as height does. A compact but crowded ensemble can need more surface area than a taller, simplified scene. Choose the table row that matches your taped footprint, then assess the metal and finish.
Indoor vs Outdoor Finishes Compared
A nativity figure's finish controls where the set can safely stand, and the differences run deeper than color. Each of the common finishes responds differently once moisture, salt, or standing water reaches the metal.
| Finish | Indoor use | Outdoor use | Upkeep |
|---|---|---|---|
| Painted steel | Good in dry rooms | Requires an exterior-compatible coating system | Repair chips with compatible primer and paint |
| Powder-coated steel | Good | Suitable when specified for outdoor exposure and fully coated | Inspect edges, joints, and mounting holes |
| Galvanized steel | Good | Useful corrosion protection; drainage still matters | Check connections and damaged areas |
| Stainless steel | Good | Suitable grade must match the exposure | Remove salt and surface deposits |
| Untreated or bare steel | Dry rooms only if rust is unwanted | Not recommended without a protective system | Keep dry and watch for corrosion |
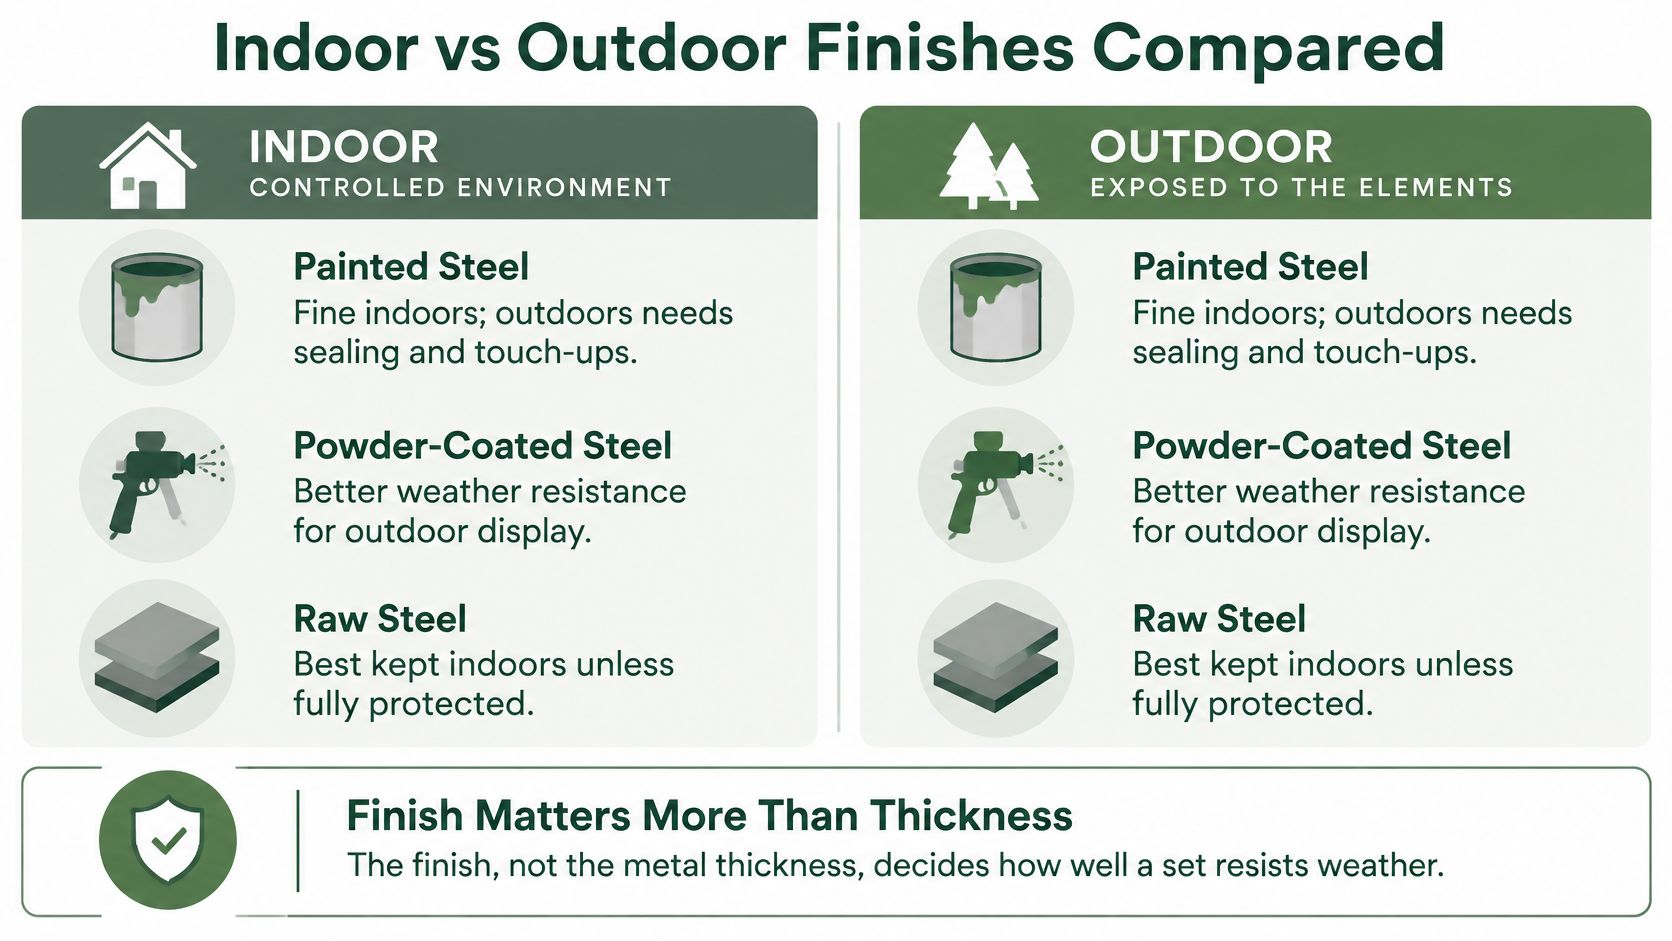
A thick profile resists bending but offers no corrosion protection on its own. For weather exposure, the metal type, surface preparation, and protective finish matter more than a heavy-looking silhouette. A figure can feel solid in the hand and still corrode at its first scratch.
What each finish means in practice
Painted steel works well indoors when it stays dry. Outdoors, judge the whole coating system: the surface preparation, primer, and topcoat all need to suit exterior exposure. A decorative color coat by itself tells you little about weather performance.
Powder-coated steel carries a baked-on finish, and the name alone guarantees nothing outdoors. Look for an explicit outdoor-use designation and continuous coverage around narrow cutouts and attachment points, since a thin or interrupted film leaves the steel exposed.
Galvanized steel protects the figure through a zinc layer bonded to the surface. If it also carries a colored coating, that coating needs to be compatible with the galvanized base.
Stainless steel can reduce maintenance, although grade and exposure still matter. Don't assume every stainless product is equally suited to salt-laden air, and compare actual product prices instead of assuming a fixed premium.
Bare steel suits a deliberately unfinished indoor look only if you accept its maintenance needs. A rust-colored appearance may be intentional, and unwanted rust can still mark nearby surfaces.
Let the location set the finish requirement
A dry living room offers the widest choice. A covered porch still receives wind-driven moisture, while an open lawn leaves the whole assembly exposed, including the base that sits against damp ground. Near coastal air, prioritize documented material suitability over broad weather-resistance wording.
Buying rule: If the listing names neither the metal nor the coating, treat outdoor suitability as unconfirmed.
For a rental or shared property, choose a finish and assembly you can maintain without permanent modifications. Whatever the finish, plan to inspect its vulnerable connections before seasonal installation, and give the figures a dry place to wait out the off-season.
How Long Metal Nativity Sets Last Outdoors
A bolt cinches down through a painted mounting hole, and the finish cracks around the washer. That thin ring of bare metal, invisible once the figure stands upright, is where an outdoor nativity set starts aging. Corrosion begins where the protective coating changes direction, ends, or gets damaged, so the weak spots deserve attention before the broad painted faces.
The SizeMarker guide to powder-coating corrosion specifications identifies cut edges, welds, fastener interfaces, and mounting holes as important inspection points, and it explains why exposure conditions and coating-system documentation tell you more than a generic durability claim.
Inspect the vulnerable details
- Cut edges: Examine the perimeter and internal cutouts for exposed metal or chipped coating.
- Welds: Check where support feet, brackets, or decorative components join the figure.
- Fastener interfaces: Look beneath washers and around bolts for trapped moisture or damage from tightening.
- Mounting holes: Inspect the inside edge, especially where assembly hardware has scraped through the finish.
Exposure changes the math. Salt air, deicing residue, fertilizer, and repeated sprinkler spray all attack a coating differently from occasional clean rain. A figure beside a treated walkway will age faster than the same figure beneath a sheltered entrance.
Salt-spray hours deserve the same skepticism. A continuous fog test describes a controlled chamber, and it reproduces changing outdoor exposure poorly. Cyclic fog-and-dry testing comes closer to real wetting and drying, so treat a test result as evidence about a coating system rather than a promise of years on your lawn.
Ask for evidence you can use
For an exposed installation, ask the seller to identify the surface pretreatment, coating thickness, and intended exposure environment. If test documentation exists, look for results from deliberately scratched, or scribed, panels showing rust creep, blistering, and edge corrosion.
A scribed panel matters because it shows what happens after the film is breached. Seasonal assembly guarantees breaches: bolts scrape holes, storage boxes rub edges, garden tools nick surfaces. An untouched sample never faces any of that.
A protective finish is a system. The preparation beneath the color matters as much as the surface you can see.
After storms and at seasonal takedown, rinse off deposits, inspect suspicious discoloration, and repair small defects with a compatible coating system. Painting over loose rust only hides it for a season, because new paint bonds to the flakes rather than to sound metal and lifts again. Our guide to protecting metal from rust walks through that repair sequence.
Stainless or galvanized construction lowers maintenance demands, but neither removes the need for drainage, compatible hardware, or connections that shed water instead of trapping it. Dry storage between seasons stretches any finish further. No single lifespan promise can account for all those conditions.
Placement and Accessibility for Homes and Yards
A guest arrives after dark carrying a dish in both hands. If reaching your door means stepping around a shepherd's base, ducking under a support line, or squeezing between two figures, the scene sits in the wrong place, however good it looks from the street.
The walking route comes first. Fit the display around it, and a metal nativity set works like any temporary outdoor structure: it occupies a footprint, and everything inside that footprint, including braces and cords, belongs to the display rather than the path.
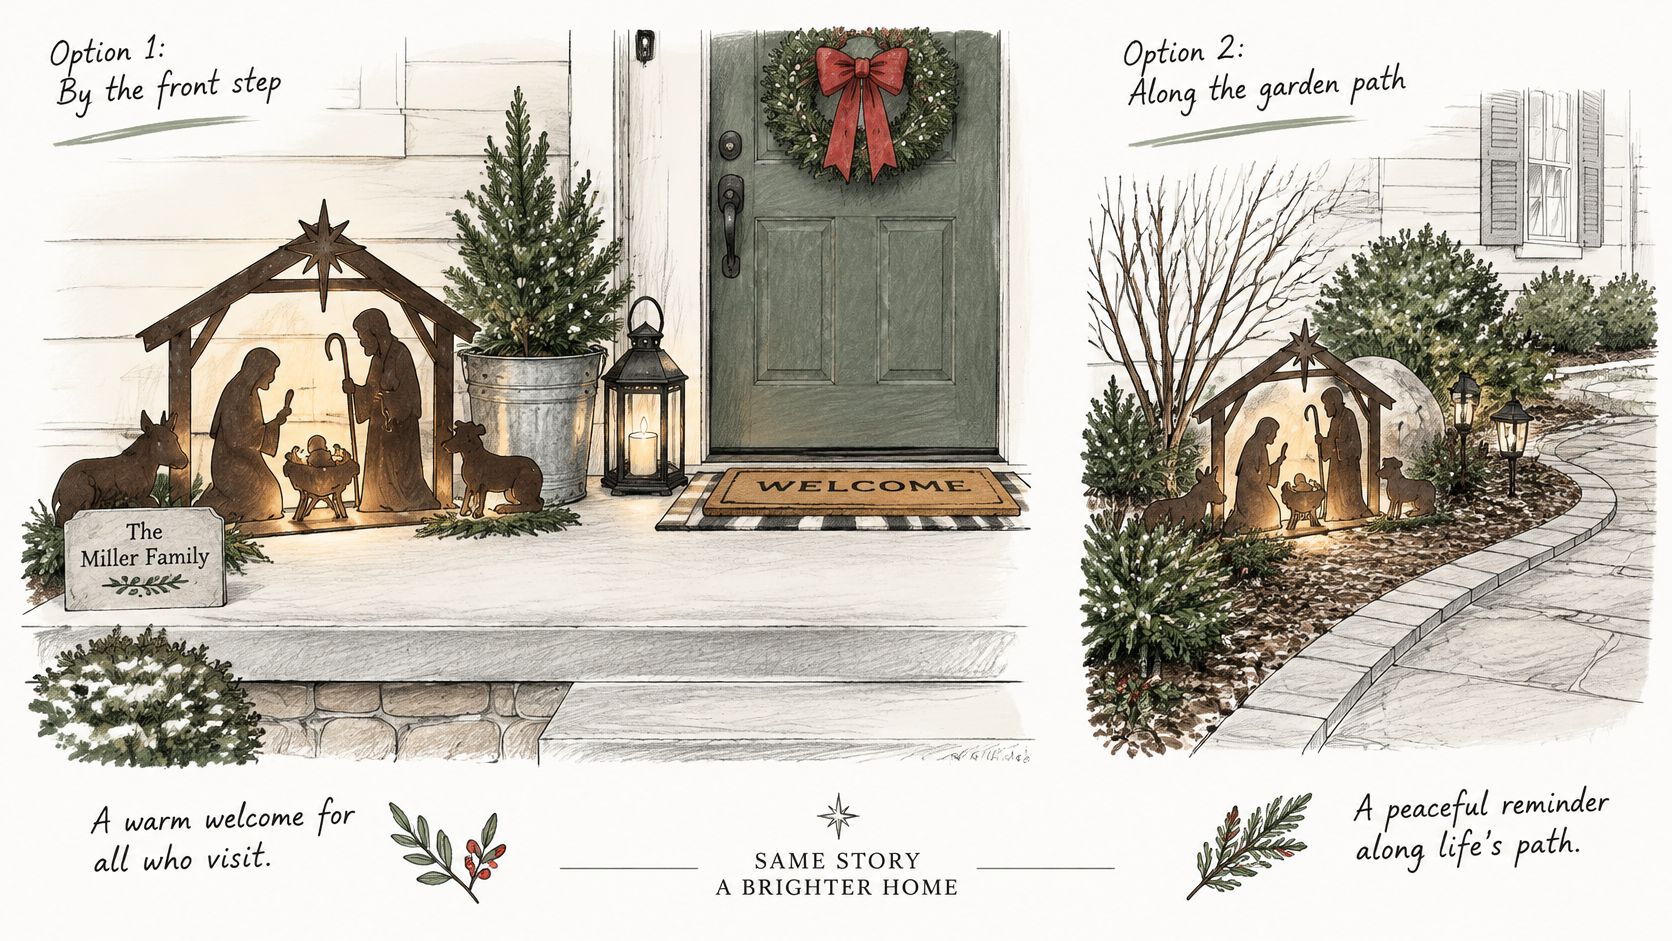
Choose a setup visitors can walk around easily
A porch vignette sits beside the doorway, outside the door's swing. Put a family-name plaque beside it rather than extending decorations across the threshold.
On a mantel or console, keep every base fully supported. No one should have to reach across delicate cutouts to open a drawer or flip a switch.
In the yard, arrange the figures in an arc set back from the walkway, main faces toward the approach. The entire installation, supports included, stays outside the walking route.
Then test it from a seated height. A wheelchair user or someone walking with a cane should follow the ordinary route without reversing around a decoration. A clear gap beside the central figures means little if a rear brace projects into it.
Make nighttime use predictable
Choose a finish that contrasts with its background, and separate overlapping figures until each outline reads on its own. Check the view from the driveway as well, keeping the scene clear of drivers' sightlines.
For broader placement ideas, our outdoor farmhouse Christmas decorating guide shows how to coordinate the surrounding entrance without crowding it.
The arrangement below shows how spacing works along an entrance.
A non-lighted set avoids electrical routing entirely and suits rentals or shared spaces where added wiring is impractical. Product-specific restrictions still apply: the VINGLI outdoor Nativity listing includes precautions concerning inclement weather, children, and flammable materials.
Finish with a dusk walk-through. Approach as a guest would, note any low projections, and confirm the scene reads clearly without anyone stepping closer.
Anchoring Outdoor Figures Against Wind and Weather
Wind load grows with panel size, so the tallest figure in the scene sets the anchoring plan. Large flat pieces catch wind like sails, and the finish can stay flawless while the assembly behind it leans, loosens, or pulls free of the soil. The Thomas Acres Nativity buying guide highlights the need for stakes, supplemental ties, and checks after severe weather.
Treat the supplied stakes as a starting point and check them against your soil.
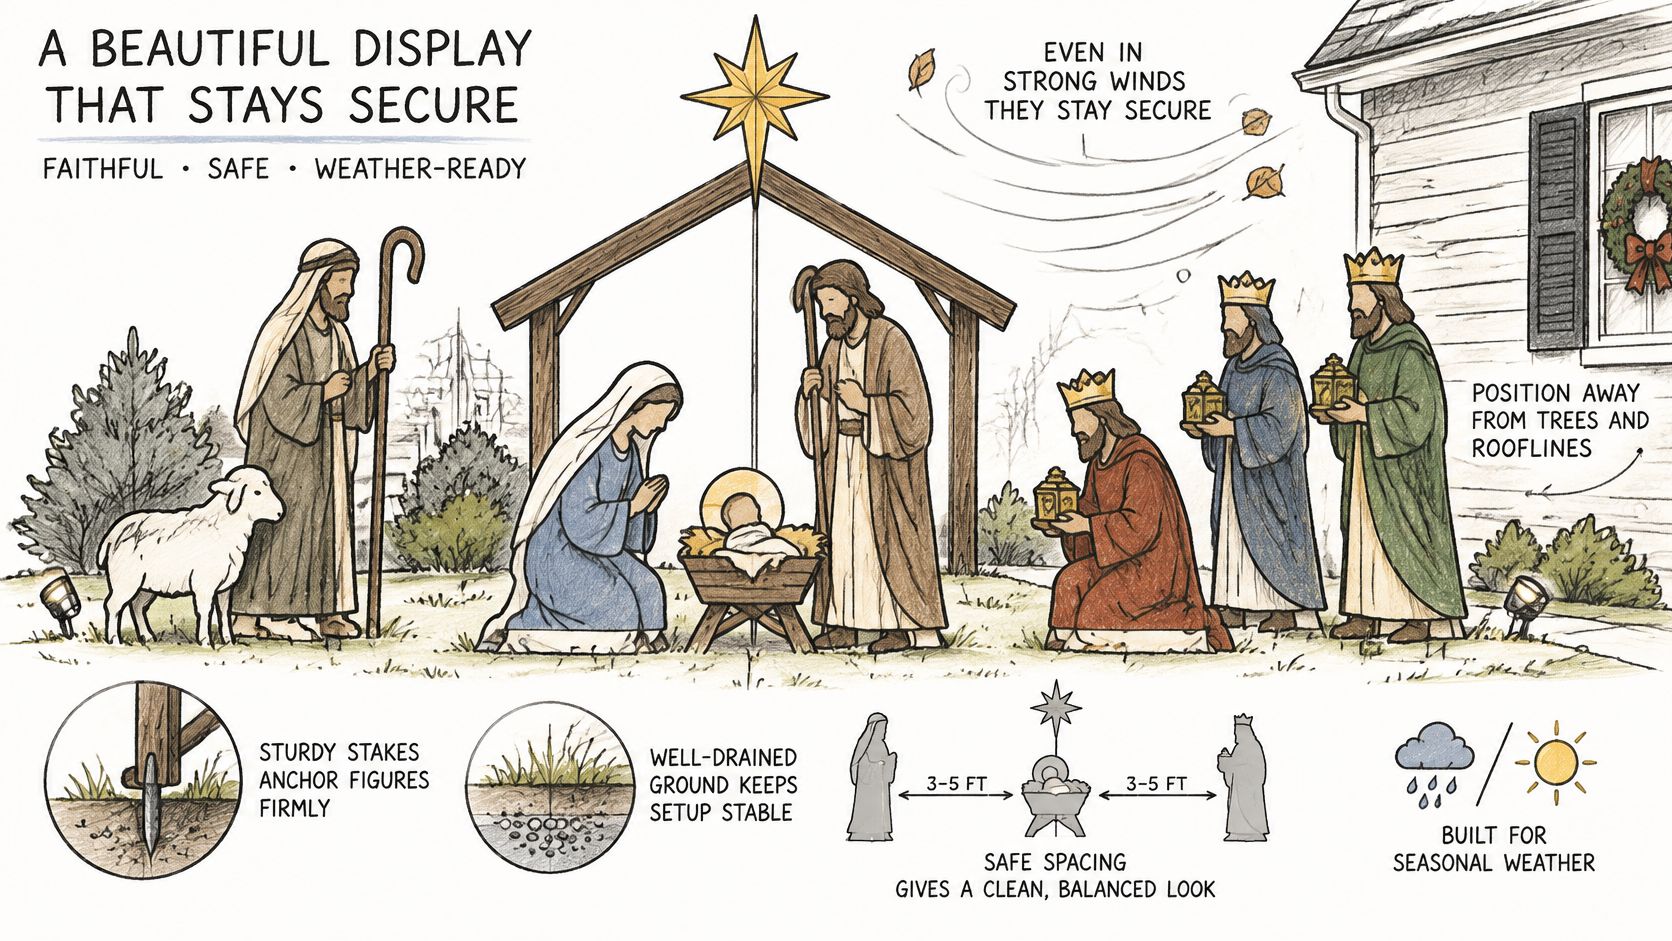
Set each anchor in five checks
- Choose firm, well-drained ground. Avoid hollows where water collects, and check for underground utilities or irrigation before driving anything in.
- Seat stakes to their intended depth. Follow the mounting design and keep exposed ends out of walking areas. A stake left half-inserted because the soil resisted gives you only part of its holding power.
- Connect at the designed points. Use the intended brackets or ties, and where supplemental restraint is appropriate, brace against the prevailing wind without pulling on delicate decorative cutouts.
- Switch methods when soil won't hold. Sandy or waterlogged ground may call for a manufacturer-approved weighted base or sandbag arrangement, with all ballast and lines kept inside the display footprint.
- Inspect after severe weather. Look for leaning panels, loose connections, shifted ballast, and lifted stakes. Take the display down when conditions exceed what the installation can reasonably handle.
Frozen ground changes the plan. Rather than hammering harder against a fragile bracket, install suitable anchors before the freeze or use an approved alternative, then inspect again when thawing soil softens.
A nearby fence can influence where you place the scene, though it doesn't automatically qualify as an attachment point. If you're also reworking the boundary, Home Pro's Remodeling & Repairs lets you compare East Texas fence options before planning the surrounding layout. Get permission before drilling into any shared or rented structure.
Pack away without stripping the protection
Dry each piece completely before packing, then separate panels with clean cloth or cardboard and support them so nothing bends in storage. Tightly sealed bags trap residual moisture, so leave some ventilation. Pull every temporary anchor when the display comes down, because a forgotten stake stays a snag point in the lawn all year. Keep the hardware with its matching figures so next season's installation begins with the correct connections.
Safe Display with Candles, Cords and Tipping
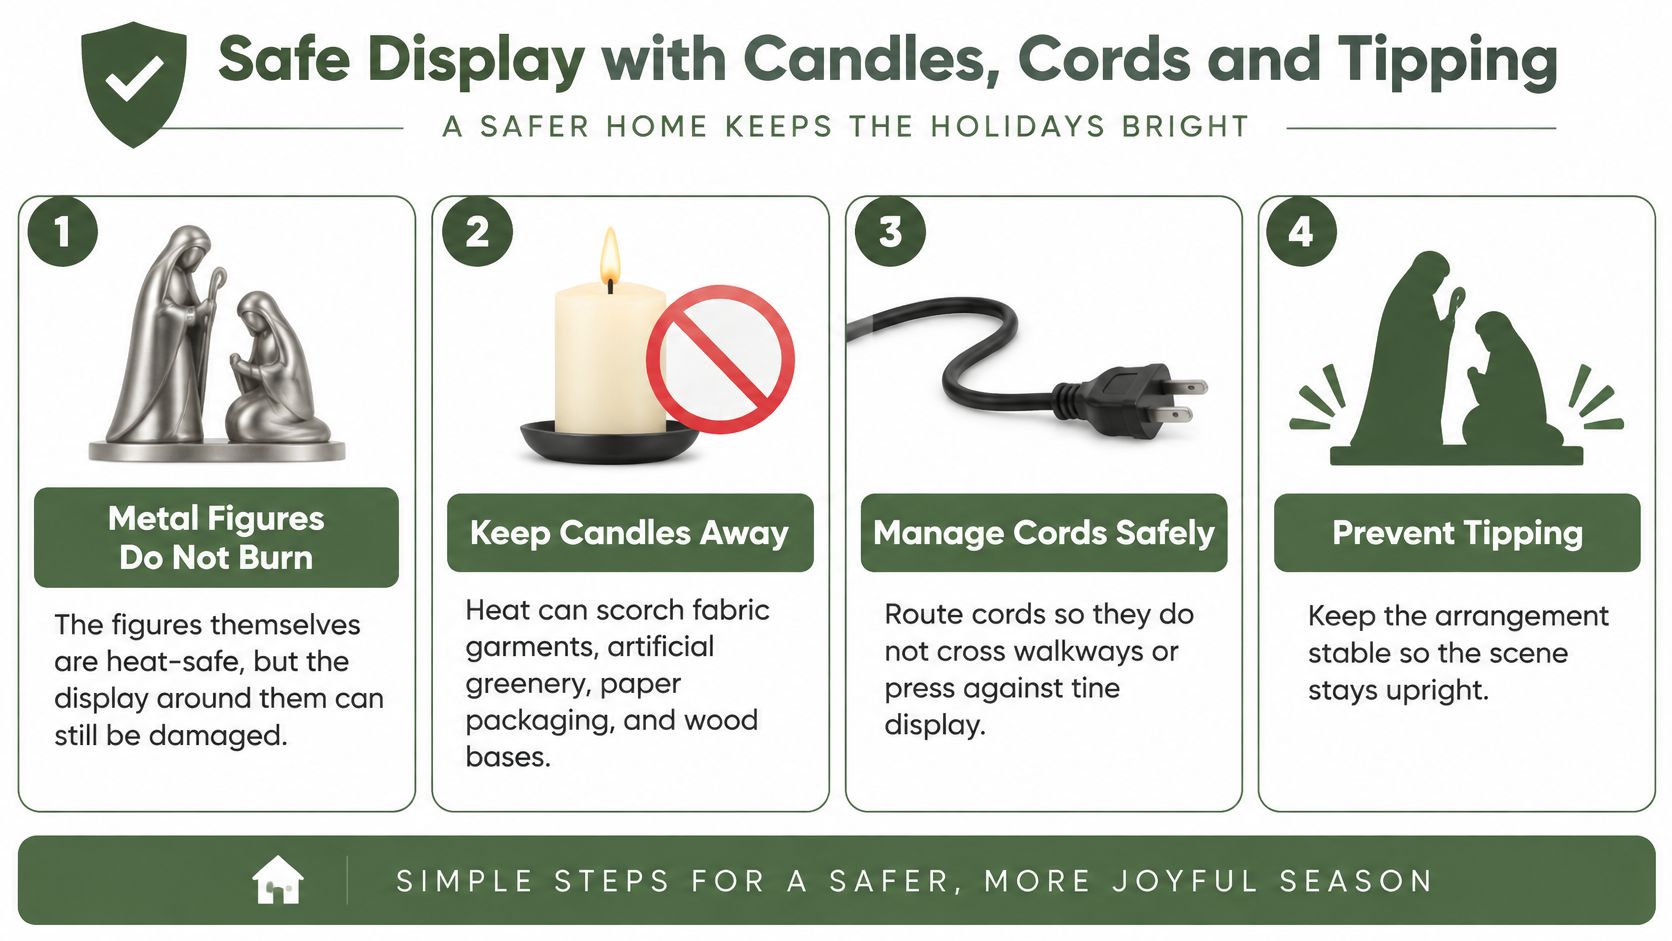
A tea light tucked inside a wooden stable to mimic lantern light can scorch the roof beam above it before the evening ends. Metal figures do not burn, which is exactly why the hazard hides in everything placed around them: fabric clothing, artificial greenery, dried scenery, paper packaging, a decorative wreath leaning against a panel. The scene works like a stage set, where the props catch fire long before the frame.
The National Park Service's holiday decorating safety guidance recommends keeping burning candles at least 12 inches from combustible materials, using nonflammable, non-tip holders, and never leaving candles unattended. Measure that clearance from the flame to the nearest combustible decoration rather than to the metal figure. A toppling candle shortens the distance to zero.
Check the whole scene before you light it
- Pick the light source first. Battery-operated candles belong anywhere the scene includes wood, textiles, hay-like material, or dried greenery. A real flame inside a stable has no margin for error.
- Put stability before finish. A decorative coating says nothing about heat rating or balance. Our gold candle holder guide covers styling options, and whichever holder you choose must grip the candle, sit flat, and suit the surface beneath it.
- Route cords like a temporary installation. Keep cables clear of sharp cut edges, moving joints, pinch points, and hot lamps. Never lay a cord beneath a metal foot, where the figure's weight can crush its insulation over time.
- Match equipment to the location. Outdoors, use outdoor-rated cords and fixtures on GFCI-protected outlets, and shield every connection from water.
- Stop tip-overs at the base. Narrow-footed figures need a stable support surface. Ornaments hung on silhouettes and light strands pulled tight between panels add loads the mounting system may never have been designed to carry, and one falling figure can drag a lit candle or live cord down with it.
Apply the same checks to every accessory added after the figures go up.
Keep the scene safe while it runs
Run a fingertip along exposed edges during setup. A painted burr is still a burr, so raise it with the seller for correction or replacement instead of working around it. Keep exits, doorways, stair approaches, and walkways clear of figures and electrical accessories alike.
Inspect cords for cracks and damaged insulation each time the set comes out of storage, and replace a worn accessory rather than concealing it behind the scene. When a lighting plan grows to include higher fixtures or complicated cable runs, professional installation beats improvised connections. Modern Yard offers Christmas light installation in Austin for homeowners weighing that route.
Before leaving or sleeping: Switch decorative lighting off, extinguish any candles, and check that nothing has shifted against a heat source.
Choose the Right Metal Nativity Set Before You Buy
A useful purchase decision starts with the installation you can manage, not the largest scene you can afford. Keep a tape measure, your footprint sketch, and the product description together while comparing options.
Check the order against your actual space
Work from the measurements you recorded earlier. The sizes section covers how to capture usable width, depth, and height; what matters now is holding each listing against those numbers and against the conditions where the scene will stand.
- Match construction to exposure. Choose an explicitly outdoor-suitable system for an exposed yard. For sheltered locations, don't confuse a roof overhead with a completely dry environment.
- Read beyond the finish label. Confirm the intended use and assembly instructions in the product description. A vague weather-resistance claim isn't enough to establish suitability for your location.
- Count every separate component. Include animals, star supports, rear braces, and the stable. Check whether the listing's dimensions describe an individual piece or the assembled display.
- Confirm what arrives and who sets it up. Note how many pieces ship, whether any assembly is required, and whether one person can lift and position the largest rigid part.
- Choose the lighting approach before ordering. Decide whether the scene will remain unlit, use battery accessories, or require an outdoor electrical route. Don't buy first and hope an extension cord will reach safely.
Apply the same test to gifts
A gift recipient in a small apartment may appreciate a compact tabletop scene more than a yard display that needs assembly and storage. For a renter, a non-lighted arrangement can avoid both permanent mounting and difficult electrical access.
A personalized wall piece suits recipients with limited floor space. The Nativity Monogram - Steel Sign is a metal sign that can be personalized with a family name, and it hangs on the wall so no floor area is needed. Check the listing for the available options and plan an appropriate hanging method for the recipient's space.
Before ordering a gift, confirm the recipient's preferred display location rather than guessing from the size of their home. A large yard doesn't necessarily mean they want seasonal installation work.
Your next step is practical: tape the intended footprint, choose the installation method, and save only products that satisfy both. Allow time for delivery, inspection, and a trial assembly before you need the display ready.
We offer custom metal signs, rustic home accents, and personalized gifts to complement a thoughtfully planned Christmas display. Visit Farmhouse World to explore personalized Nativity wall art and coordinating accents, with your measurements and mounting plan in hand.


