

You're standing in the garage with a blank steel sheet against the wall, a rough farmhouse address sign on paper, and several unanswered questions. Should the sign survive an exposed gate or sit under a covered porch? Will visitors read it from the road, or see it up close on an interior wall? Those choices matter more than the cutting tool you buy first.
Learning how to make custom metal signs starts with matching the material, artwork, finish, and mounting method to the sign's actual job. An indoor monogram, an outdoor address plaque, and a ranch or coop sign may all use metal, but they don't need the same thickness, edge treatment, or protective coating.
Table of Contents
- Picture Your Sign Before You Pick Up a Tool
- Choosing Metal, Tools, and Workspace
- Preparing Vector Artwork and Cut Files
- Cutting, Shaping, and Deburring the Metal
- Surface Prep, Paint, and Finishing Options
- Adding Names, Monograms, and Address Details
- Safety, Troubleshooting, and Final Checklist
Picture Your Sign Before You Pick Up a Tool
Before drawing a cut line, settle four practical questions:
- Where will it live? A gallery wall is dry and controlled. An open yard exposes the sign to rain, sunlight, wind, and ground moisture. A covered porch sits between those conditions.
- How far away will people read it? A mailbox sign needs strong, simple lettering. A bar backsplash can use smaller decorative details because viewers stand close.
- How long should it last? A seasonal decoration can use a simpler finish. A permanent address plaque needs stronger corrosion protection and mounting.
- What must it communicate? House numbers, a family name, a ranch brand, and a logo each demand different spacing and visual emphasis.
Those answers determine the rest. An outdoor address plaque may justify a rigid 16-gauge sheet, drilled mounting holes, and a durable coating. An indoor monogram can work with 20-gauge metal, painted lettering, and a lighter hanging system. A decorative shape that only needs to move from room to room may use 24-gauge stock, provided the design has enough support to resist bending.
Practical rule: Design for the viewing distance first. A beautiful sign that can't be read from the driveway has failed its main job.
For farmhouse interiors, it also helps to consider the wall around the sign. Ideas such as rustic wall decor arrangements can help you judge whether your piece needs a bold silhouette or a quieter finish. If the design will eventually include a vehicle-related graphic rather than a permanent metal panel, a resource for shop custom windshield decals may be a more suitable production route.
Write the answers on your work order before buying metal. Once the location, reading distance, service life, and message are fixed, the project becomes a sequence of decisions instead of a series of guesses.
Choosing Metal, Tools, and Workspace
There isn't one perfect metal for every sign. Mild steel gives a substantial feel and accepts paint well, but it needs careful corrosion control. Aluminum is lighter and naturally more forgiving outdoors. Galvanized sheet resists corrosion, although its coating can complicate cutting, welding, and finishing. Pre-primed aluminum plate reduces some preparation work, but you still need to inspect the factory coating before applying graphics or paint.
The gauge affects stiffness, weight, and how easily the sheet distorts. These are useful starting points for a small-shop decision:
| Metal / Gauge | Best Sign Use | Cutting Method | Notes |
|---|---|---|---|
| Mild steel, 16 gauge | Outdoor address plaques | Plasma, laser, jigsaw with metal blade | Rigid and substantial, but prime every exposed edge |
| Aluminum, 20 gauge | Indoor monograms and light plaques | Jigsaw, CNC router, laser where suitable | Light and easy to handle, with less rust concern |
| Aluminum, 24 gauge | Lightweight decorative shapes | Snips, jigsaw, CNC router | Easy to form, but needs backing or returns if the shape is broad |
| Galvanized sheet | Utility, garden, or sheltered signs | Snips, jigsaw, plasma with proper controls | Remove or manage the galvanized coating safely before hot work |
| Pre-primed aluminum plate | Painted indoor or outdoor signage | Jigsaw, router, laser where compatible | Protect the primer from gouges and seal cut edges |
A plasma cutter changes the range of shapes you can produce, but it isn't the only sensible entry point. A jigsaw with a fine metal-cutting blade, a drill, files, clamps, and patience can handle simple rectangles, plaques, and silhouettes. Hand snips are useful for thin sheet, though they can curl an edge, so plan on flattening and dressing the cut.
Your workspace needs more than a power outlet. Set up a flat cutting table, secure the sheet with clamps or magnets, and keep enough room to lay the finished sign flat while it dries. Grinding and painting require ventilation. Wear eye and ear protection during cutting and grinding, use suitable respiratory protection for dust and coatings, and keep solvents away from ignition sources.
For visual planning, an observational drawing exercise such as this OCAD Level 2 portfolio task can be useful before committing a design to sheet stock. Material behavior matters just as much as the sketch, so consult practical guidance on protecting metal from rust before choosing a finish.
Preparing Vector Artwork and Cut Files
A clean cut begins with a clean file. Build the artwork in inches or millimeters, not pixels, and set the document to the finished sign size. Work at 1:1 scale, because a file that looks correct on screen can still produce the wrong physical dimensions when imported into cutting software.
Separate the artwork into named layers:
- Cut paths define material that must be removed.
- Etch lines mark shallow detail, guides, or decorative outlines.
- Score lines indicate a controlled crease or bend rather than a full cut.
Convert all text to outlines before export. Fonts can change when a file moves between design and machine software, and outlined letters preserve the intended shapes. Inspect thin characters carefully, especially A, R, e, and a. Enclosed centers need bridges, or the interior pieces will drop out during cutting.
Kerf compensation is the next decision. Every cutting process removes material with a particular width, so a cut path placed directly on the nominal outline may make letters or holes slightly undersized. Measure or use the machine's established kerf setting, then test a small section before committing to an elaborate design.
Keep layers visually distinct so the software can identify them. Depending on the equipment, export a DXF for plasma, or an SVG or G-code workflow for CNC routing. Before sending the file, zoom into every corner and run a pre-flight check for overlapping paths, duplicate lines, open contours, stray points, and unjoined shapes. A file that passes those checks still deserves a small physical test when the lettering is fine or the design includes tight interior spaces.
Cutting, Shaping, and Deburring the Metal
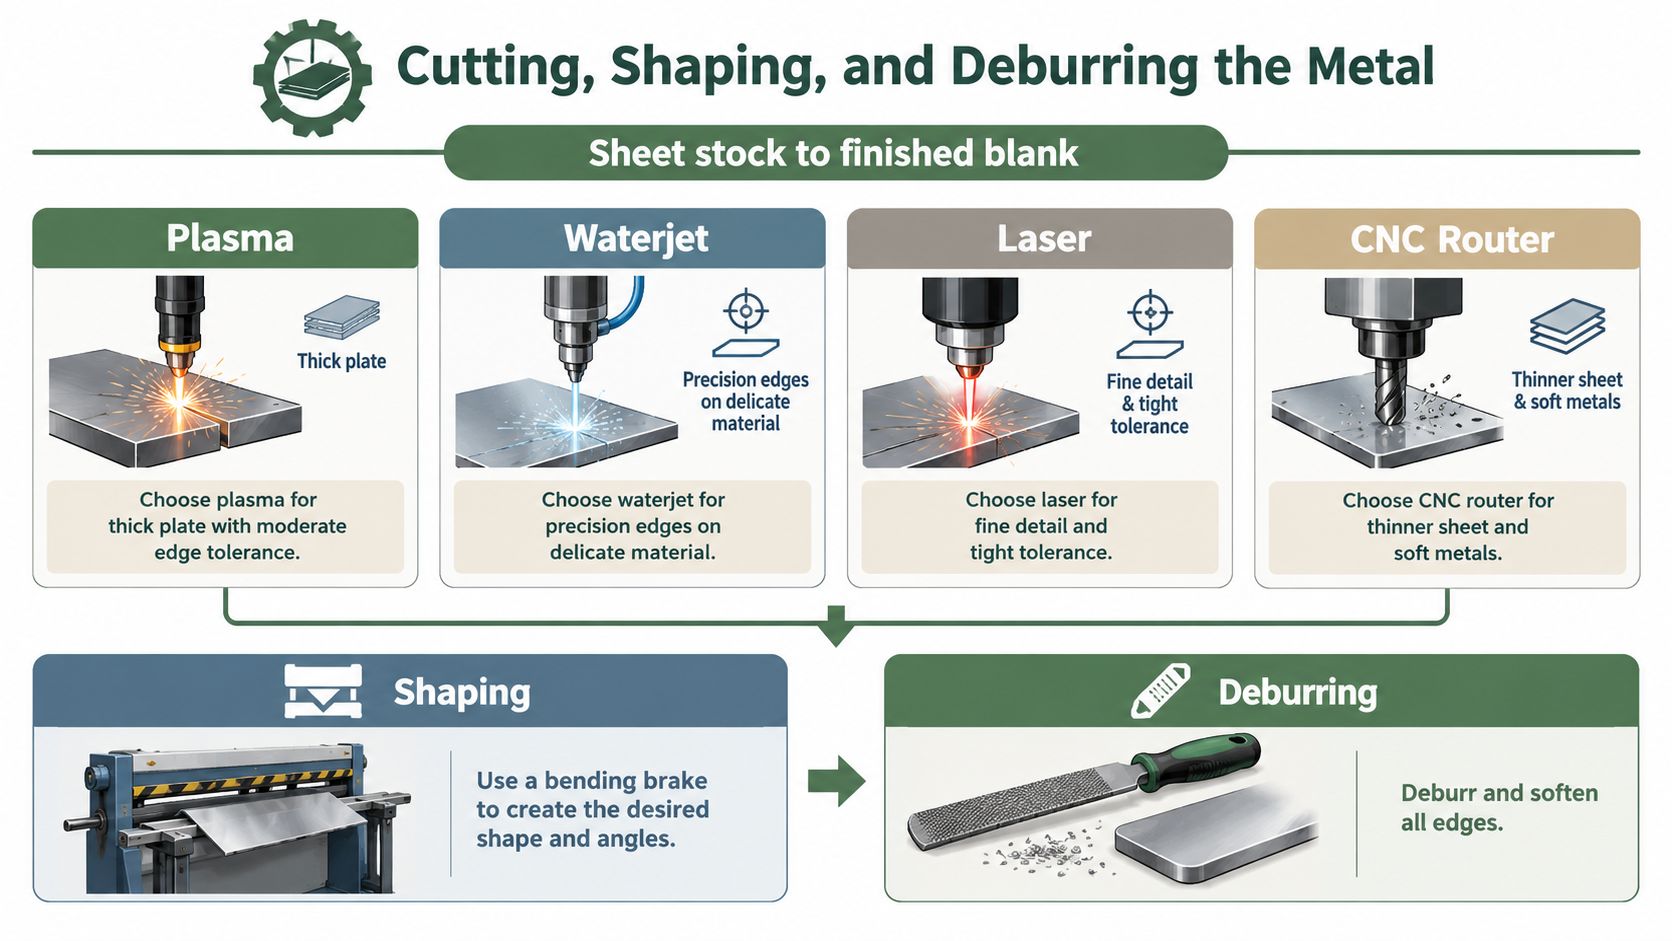
The cutting method should follow the material, thickness, and edge standard. Plasma suits steel shapes and thicker stock where a little edge cleanup is acceptable. Waterjet handles delicate materials and precise edges without concentrating heat in the same way. Laser cutting is a strong choice for fine detail and repeatable lettering. A CNC router works well with thinner sheet and softer metals, especially when the sign needs routed recesses or controlled surface detail.
Simple rectangles don't always need CNC equipment. A shear, jigsaw, or track-guided saw can produce clean straight blanks when the operator supports the sheet and uses the correct blade. Clamp a sacrificial backer beneath thin stock, and use magnetic clamps or mechanical stops to prevent movement. Unsupported sheet can vibrate, catch, or warp while the tool is moving.
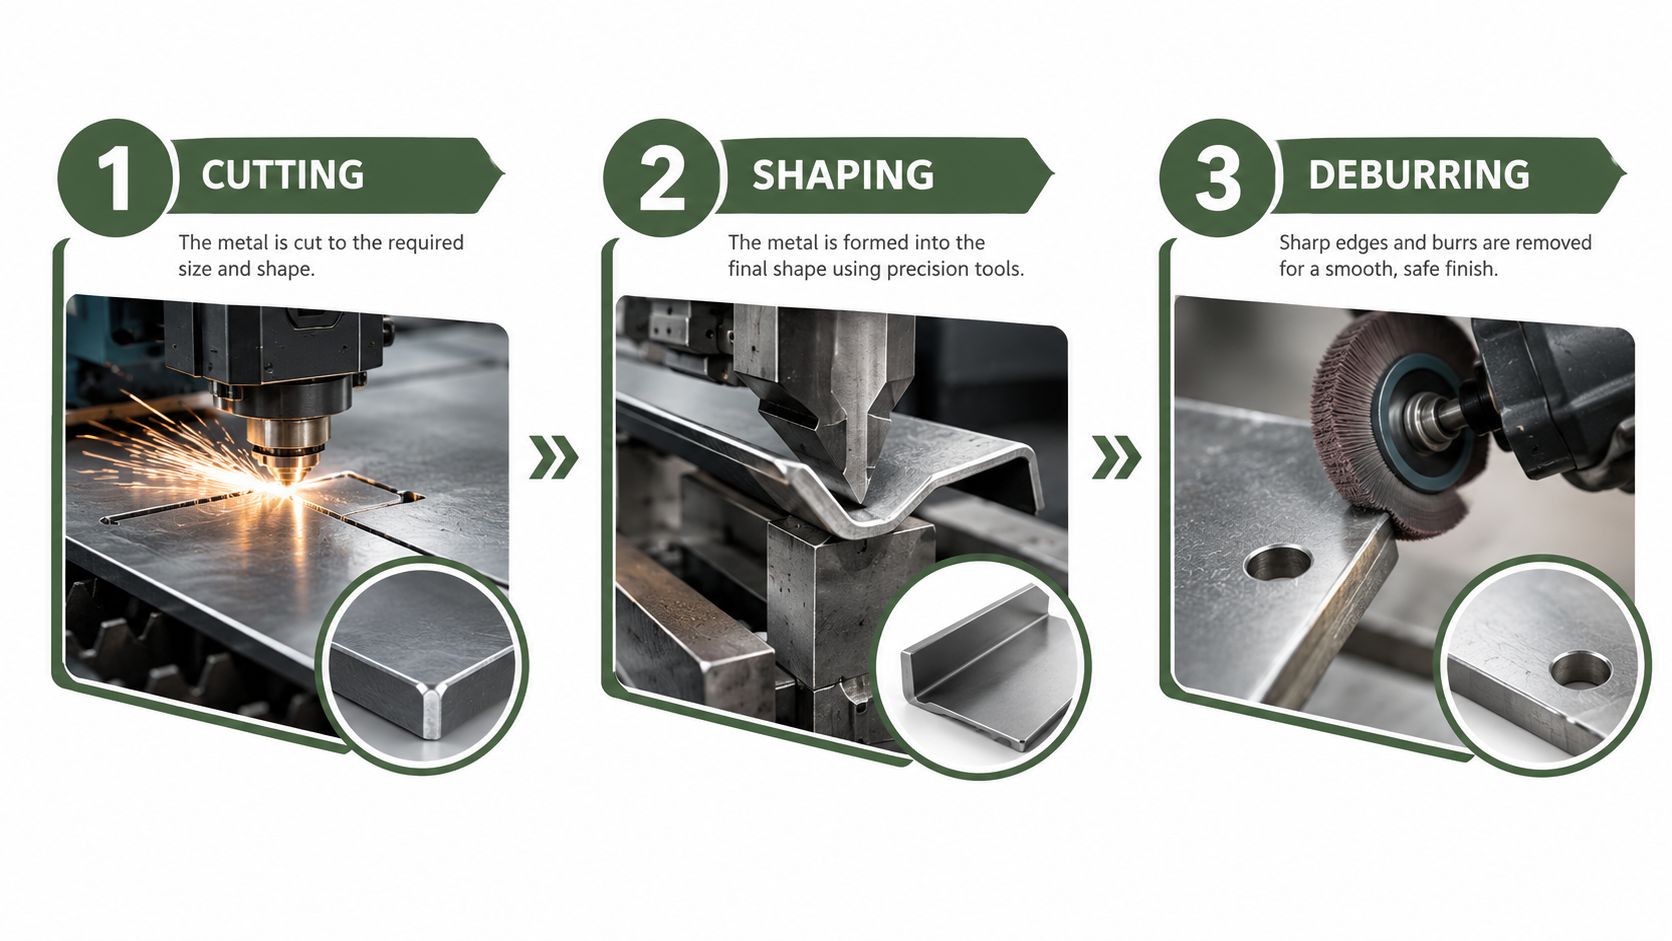
After cutting, handle the blank as unfinished work. Remove dross from plasma edges with a chisel, file, or abrasive wheel. Knock down laser heat tint where the finish requires a uniform appearance, and remove the fine burr that can catch a cloth or cut a hand. A small edge break also gives paint a better transition than a razor corner, which can hold less coating and become a failure point outdoors. Guidance on making metal signs emphasizes secure preparation, edge care, and checking mounting details before finishing.
Drill mounting holes while the blank is still easy to hold flat. If the design needs welded stakes, brackets, or returns, clean the weld zones before assembly. Curved ranch and coop signs may need post-forming over a simple buck or with a brake, but form the metal before final coating so you don't crack or distort the finish. A rustic interior display can sit comfortably alongside objects such as Farmhouse Pillar Candle Holders Set of 3, but the sign itself still needs safe, softened edges.
Watch for four common failures: plasma dross left under paint, heat discoloration that shows through a pale coating, micro-burrs that telegraph through the finish, and thin sheet that warps because the cut path stays in one hot area too long. Slow, deliberate cleanup usually takes less time than repairing a finished sign.
Surface Prep, Paint, and Finishing Options
Finish the sign in this order: degrease, scuff, mask, prime, topcoat, cure. Skipping the sequence creates problems that attractive paint can't hide. Solvent-wipe the surface with a compatible cleaner, scuff glossy areas, and remove dust before masking. Bare steel generally needs an appropriate corrosion-inhibiting or self-etching primer, while aluminum needs a primer system compatible with its surface and the final coating.
For small painted signs, 220 to 320 grit abrasive can provide a useful mechanical key after cleaning. Apply thin coats rather than trying to cover everything in one pass. Brush-and-roll can produce the hand-painted farmhouse look, while HVLP spraying gives a more even field when the workspace supports safe ventilation. Brushed steel, controlled patina, and raw rust can all work, but each needs a clear plan for stabilization and maintenance.
| Finish System | Best For | Prep Required | Expected Outdoor Life |
|---|---|---|---|
| Indoor acrylic enamel | Dry interior decor | Degrease, scuff, compatible primer | Limited to sheltered conditions |
| Outdoor-rated polyurethane | Painted outdoor plaques | Thorough cleaning, primer, thin coats, full cure | Suitable when applied over a prepared substrate |
| Two-part automotive clear | Detailed painted work | Clean base, compatible color coat, controlled application | Appropriate where the complete system is rated for exposure |
| Polyester powder coat | Durable outdoor steel or aluminum | Clean, properly prepared metal, professional application | Strong choice for exposure when fully cured |
Powder coating is a benchmark for durable sign finishing because the coating is applied electrostatically and oven-cured into a cross-linked polymer surface. It improves resistance to scratches, corrosion, and fading, and one certified applicator advertises more than 6,500 color options for matching branded or decorative work, as shown by Diamond Manufacturing's finishing information.
Finish discipline: Cure time is part of the finish, not an optional pause. Handling a coating before it has fully hardened can leave fingerprints, dents, and weak edges.
Air-dry systems need the full manufacturer's recoat and cure schedule. Powder coating uses a controlled oven process rather than ordinary air drying. Fish-eyes often point to contamination, orange peel can signal poor spray setup or material balance, and early fading may indicate an unsuitable coating or missed cure requirements. For prototype work, this guide to surface finishing for prototypes offers useful context on preparation and coating choices.
Adding Names, Monograms, and Address Details
Personalized lettering should be designed for the viewer, not just for the artwork file. A family name on an indoor wall can tolerate finer detail than an address plaque viewed from a driveway or road. Use a simple letterform for distant reading, preserve open counters, and add space around each character so thin strokes don't close up after cutting, painting, or powder coating.
Test the actual word at its intended size before cutting the final sheet. Print it, stand at the planned viewing distance, and check whether the numbers remain distinct in low light. For a monogram, establish a visual center rather than just aligning the bounding box. A family name may sit below the initial, inside a border, or across the widest part of a shaped sign, but the layout should leave a breathing margin around the hardware and edge.
Common application methods suit different finishes:
- Routed and paint-filled letters create depth and a strong tactile contrast.
- Vinyl stencils make short production runs practical, but the surface must be clean and the stencil firmly sealed.
- Laser-marked details work for fine, permanent graphics where the substrate and machine support the process.
- Welded or stud-mounted letters add shadow and dimension, though they increase weight and mounting demands.
Hardware follows the same logic. A French cleat or Z-bar distributes weight across a wall. Keyhole slots conceal fasteners on lighter plaques. Stand-off posts create separation from the wall and suit a more architectural address display. Ranch branding signs may use visible brackets, while a front-door plaque often benefits from concealed mounting.
For a cohesive farmhouse interior, a custom monogram sign can show how a central initial, name, and border work together. Reflective material or backlighting can improve nighttime address visibility, but both require careful wiring, weather protection, and a mounting design that leaves service access.
Safety, Troubleshooting, and Final Checklist
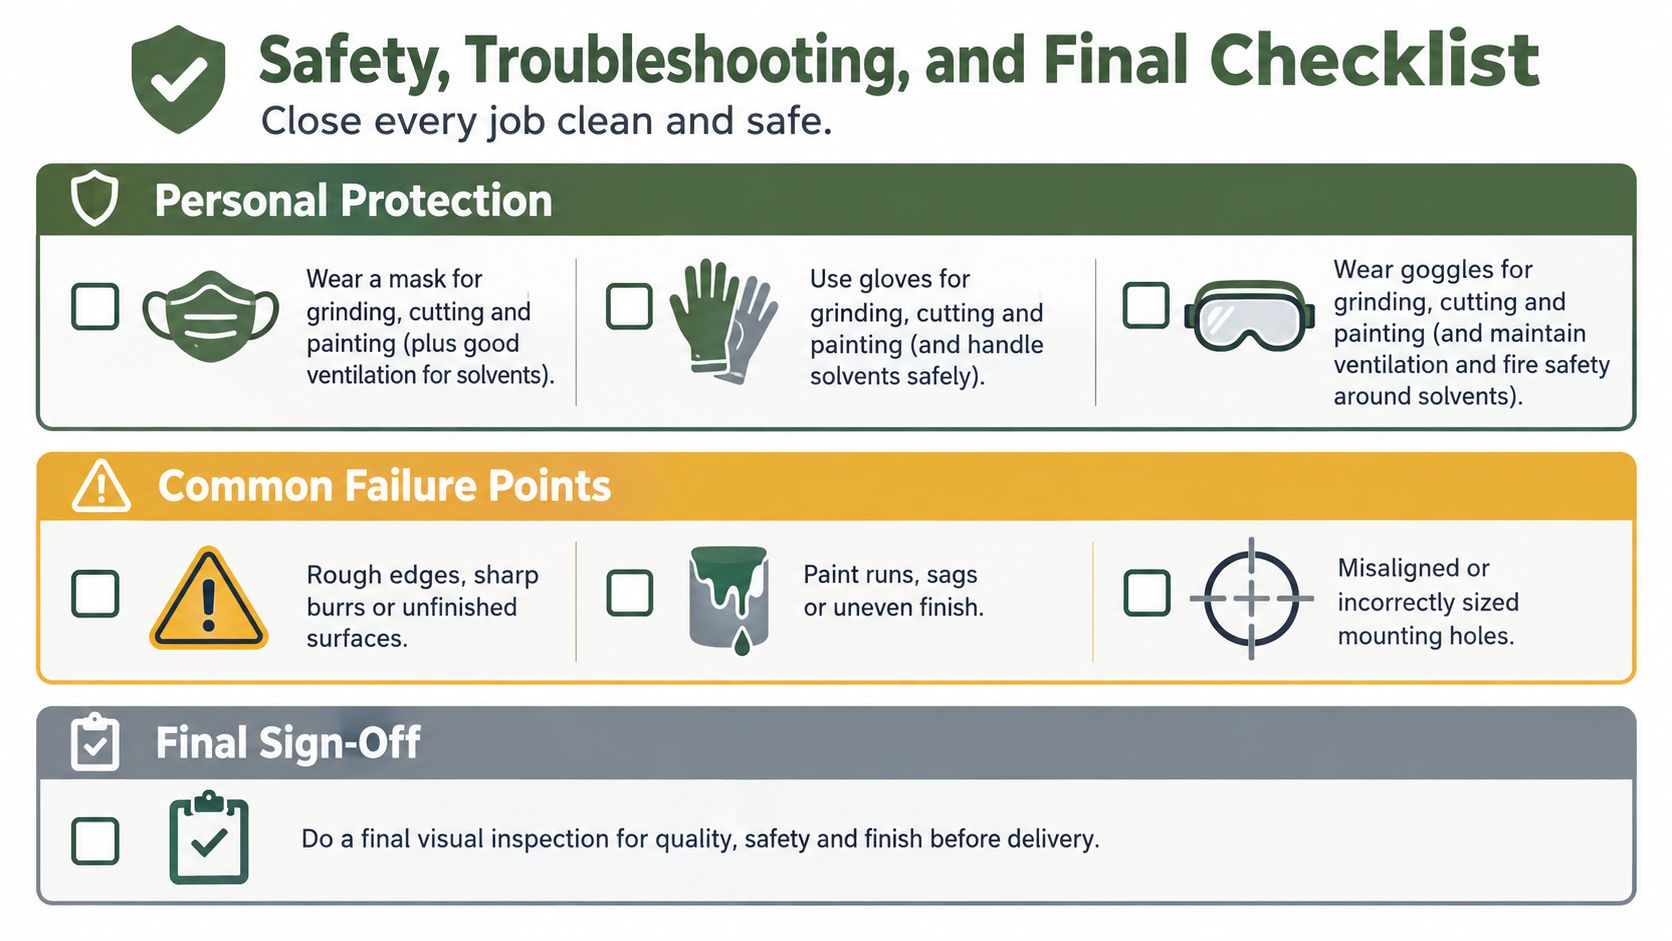
A finished sign is only successful when it is safe to make, safe to handle, and suited to its location. Grinding and cutting require eye protection, hearing protection, suitable clothing, and control of sparks. Painting needs ventilation and solvent fire safety. Powder coating adds its own equipment and heat hazards, so follow the applicator's procedures rather than improvising an oven or spraying arrangement.
Troubleshooting is usually more useful when it connects each failure to a corrective action:
- Burnt or heavily drossed plasma edges: Review travel speed, air supply, and consumables, then clean the edge before any primer touches it.
- Paint flaking from steel: Strip loose coating, remove contamination and corrosion, and rebuild the primer system rather than painting over the failure.
- Vinyl letters lifting: Reclean the surface, confirm compatibility between vinyl and coating, and apply the stencil without stretching it across a rough edge.
- Misaligned mounting holes: Use a full-size template and check hole positions against the wall or post before finishing.
- A warped thin blank: Reduce heat concentration, improve support, and reconsider whether the sheet needs a folded return or backing frame.
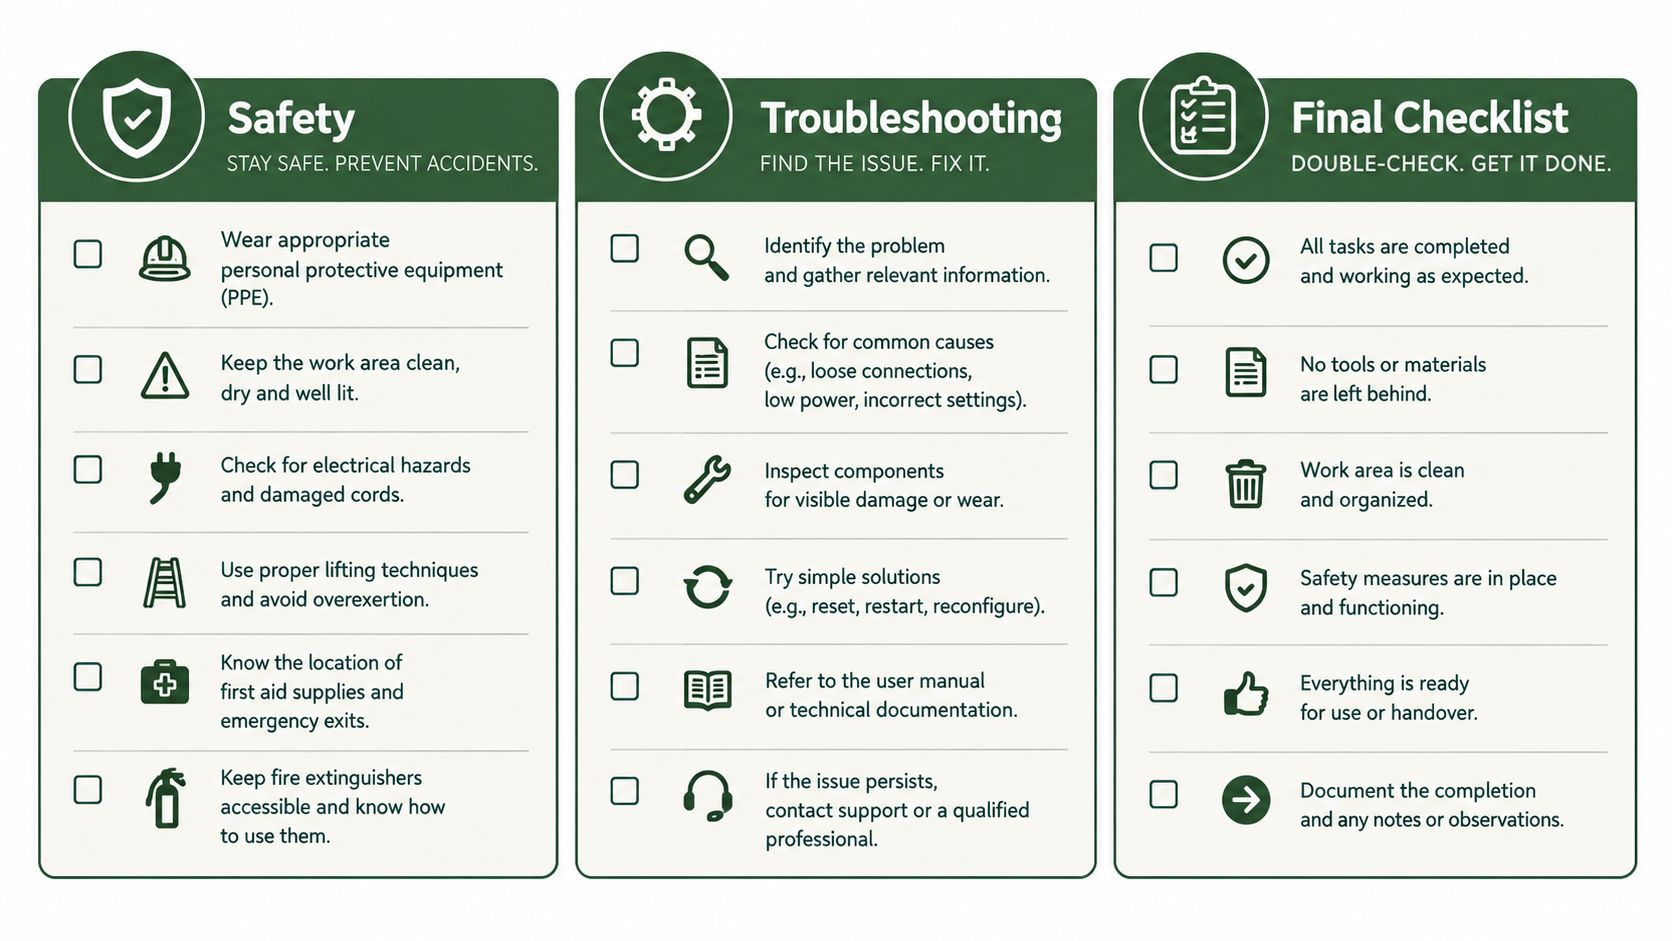
Before cutting, write down:
- Location: Indoor wall, covered porch, open yard, gate, coop, or ranch entrance.
- Material: Steel, aluminum, galvanized sheet, or pre-primed plate.
- Gauge: Chosen for stiffness, weight, and the viewing environment.
- Message: Address, name, monogram, logo, or directional wording.
- Finish: Paint, patina, stabilized rust, or powder coat.
- Mounting: Cleat, keyhole, Z-bar, posts, brackets, or stakes.
- Inspection: Edges softened, holes aligned, coating cured, lettering legible, hardware secure.
Farmhouse World offers personalized metal signs for family names, addresses, ranches, and chicken or duck coops, along with rustic wall decor and complementary home accents. Visit Farmhouse World to compare sign styles and find a piece that fits the location and farmhouse setting you've planned.


